Sampling Design using AREA2
AREA2 (Area Estimation & Accuracy Assessment) is a graphical user interface publicly available in GEE for sampling design. It works much the same as the SEPAL tool. The difference between the two is more a matter of preference, and the AREA2 has the opportunity to adapted with small code alterations. Several sampling design methodologies are included as options. Note, the necessary aspects of the tool are available but the repository is no longer being regularly updated.
See the full ‘Read the Docs’ website for more details on the tool.
Pre-requisites
- A GEE account and access to a GEE cloud project.
- A previously generated map to use for stratification uploaded as a GEE asset
- AOI?
Getting Started with AREA2
1. Add the tool to your personal GEE repository by clicking this link: https://code.earthengine.google.com/?accept_repo=projects/AREA2/public. - Note: We have added a local version of AREA2 to our repository with some additional features and pre-set parameters. https://code.earthengine.google.com/1f971ddd4035bcac3c25e87b86396444 (Stratified_Random_Sampling_alteredAREA2 in the Liberia_Forest_SIG_workshops GEE repository)
2. On the left side of your GEE code editor under the scripts tab you will now see projects/AREA2/public listed under the Reader access repositories. You can click the drop down arrow to view the included scripts. 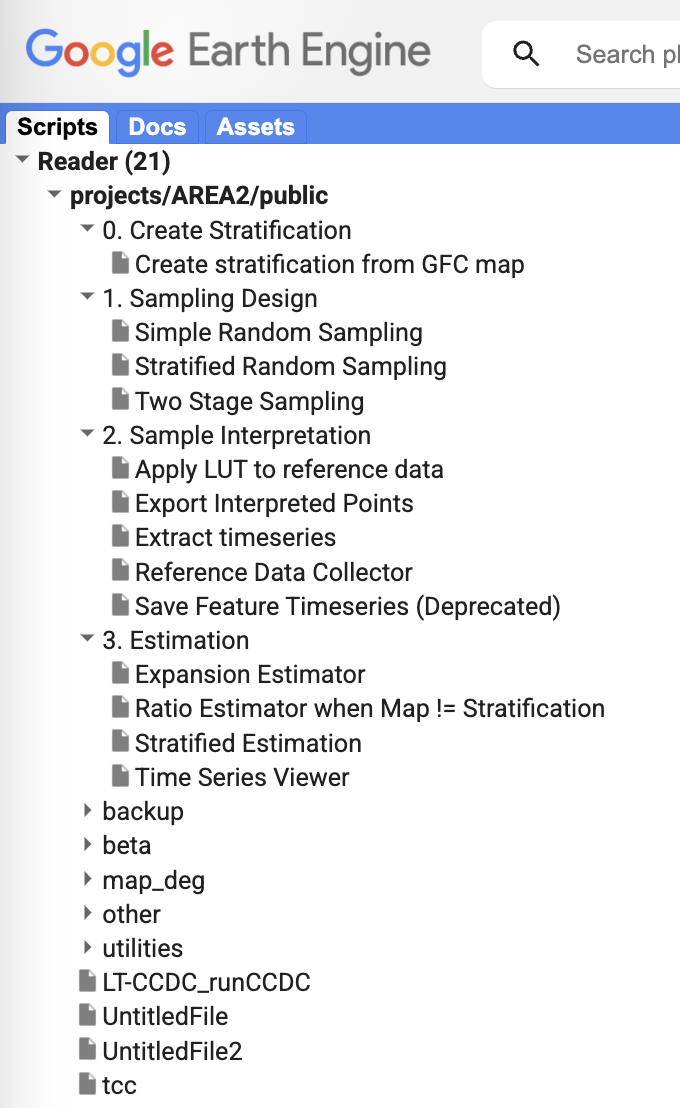
3. We will only be using the Stratified Random Sampling tool under the Sampling Design subfolder. Double click that script to open it in the code editor.
Note: You can choose to save a copy of the script to your local repository instead of using the public repository directly. You will still be referencing the files in the public ‘projects/AREA2/public:utilities/misc’ folder. You may choose to copy this folder to your local repository as well and change the path in the scipt to reference you local location for it.
The further directions below are directly from https://area2.readthedocs.io/en/latest/getting_started.html.
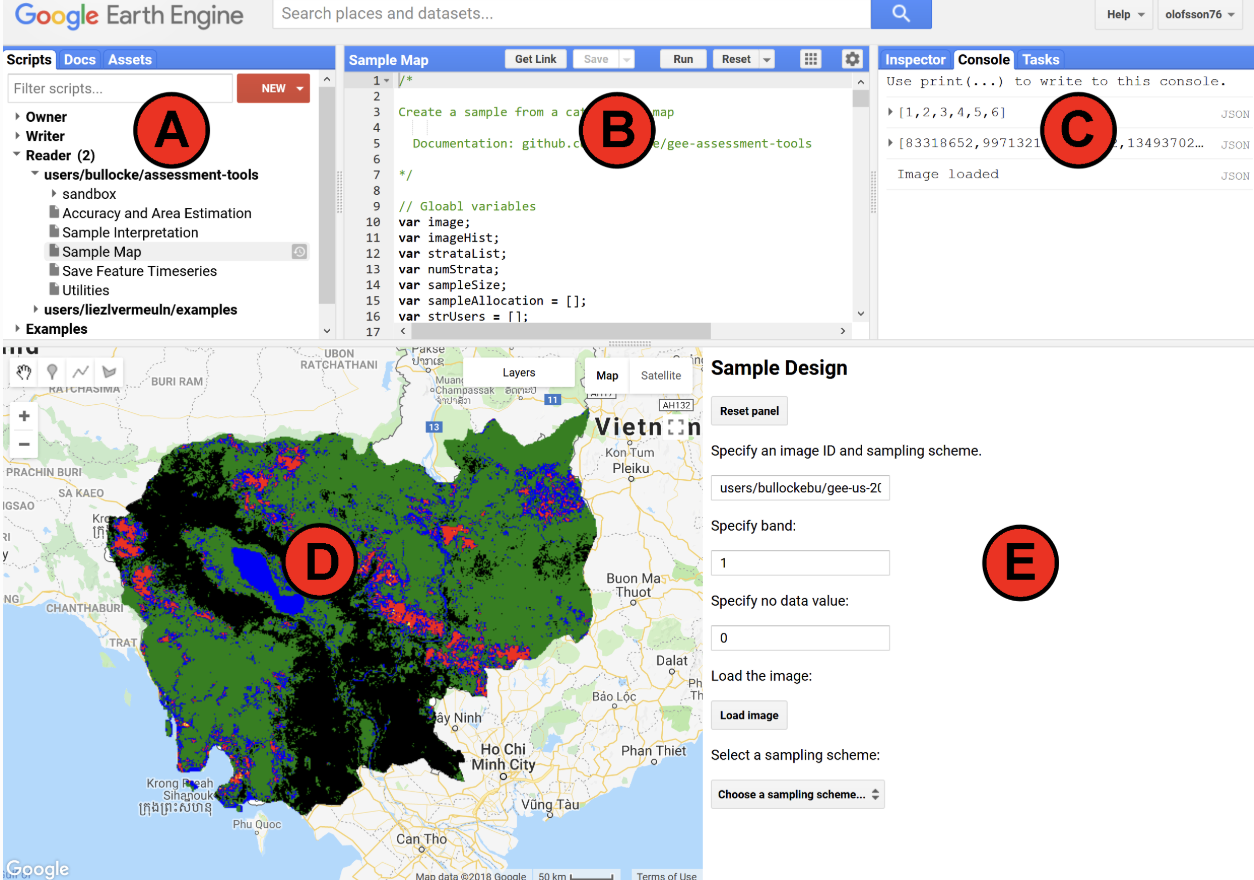
4. To run a script, highlight it in Script Manager (A), which displays the code in the Code Editor (B), and click the Run button (located in the Code Editor). 5. When running the scripts in AREA 2, a Dialog Pane will appear (E). The Dialog Pane is where you specify the information required for each step of the sampling design, response design, and analysis. Note that after communicating via the Dialog Pane (loading a map for example), Earth Engine does not indicate if the application running. Therefore, push the buttons only once and wait for the application to respond before continuing. 6. The Console (C) displays output specified by script. If errors occur while running a script, the error messages are displayed here. 7. The Map (D) is where spatial data is displayed.
Notes on Changes Made to Our Local Version of AREA2
- SEED defined at the top of the script (not in the GUI)
User defined parameter (this is used for repeatable randomization and is saved in the file name)
var definedseed = 33 //set this to any integer you like
This variable is used in the stratifiedSample function – “seed: definedseed”
User must comment out this “seed: definedseed” line and remove from file name if using a seed is not desired
- FILENAME includes seed for later reference
“description:’sample_csv_seed’+definedseed,”
“description:’sample_asset_seed’+definedseed,”
User must remove “+definedseed” from these lines from “description:” lines of the export funtion if a seed is not desired
- In the stratifiedSample function, set scale parameter to the map pixel size instead of a hard-coded 30
However, if you are using Landsat, it works with the update or without
“scale: Number(SCALEBOX.getValue()), // Landsat spatial resolution // edited - was 30 in the original AREA2”
- PRE-SET STRATA MAP ASSET PATH in the code instead of having to type it in the GUI (optional)
If desired the user can change the asset path in the code. This variable is now called upon in the code for the default path in the first textbox “IMAGEID = ui.Textbox(‘Specify image ID’, defined_strata_map_path);”
var defined_strata_map_path = ‘projects/pc556-ncs-liberia-forest-mang/assets/Liberia_landcover_forest_map_10m_v1_2014’ //set this asset path
1. Using the AREA2 Stratified Random Sampling Tool
For now we have pre-loaded a stratification map as a GEE asset for you. You will learn how to upload your own assets later in the workshop.
1. Enter the asset path for your land cover stratification map:
projects/pc556-ncs-liberia-forest-mang/assets/Liberia_landcover_forest_map_10m_v1_2014
2. This is not a multi-band image so leave the next parameter as 1, and leave the mask value as 0.
3. Set the spatial resolution to 10m. This depends on the pixel size of your selected stratification map.
4. Click Load Image.
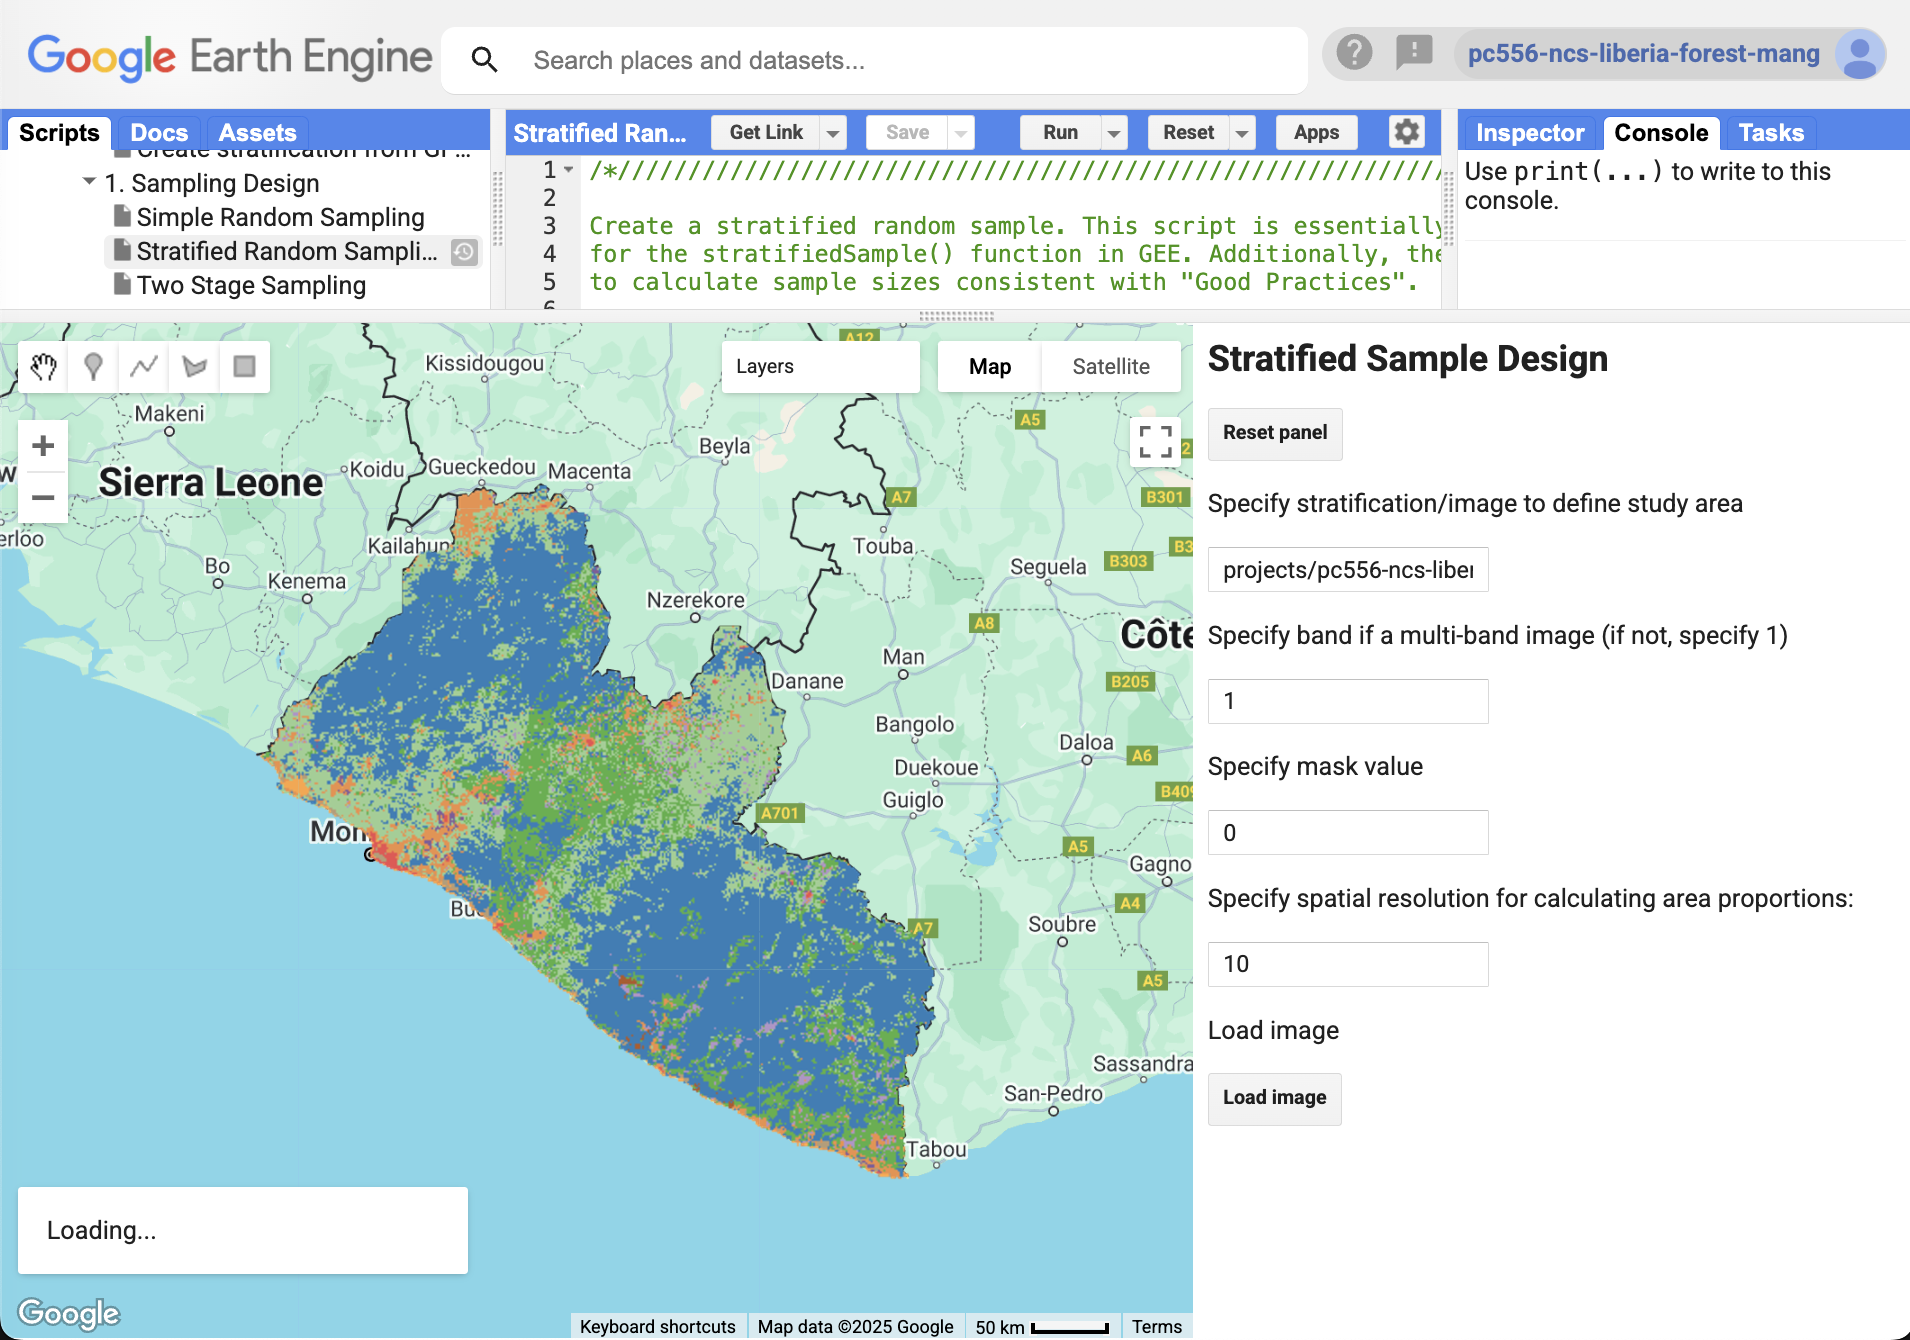
5. The strata weights and pixel-counting estimations of their area in square meters will be printed to the console panel. Copy down these values for later use in your accuracy assessment!
6. Now you will determine the sample size using one of the three methodology options:
- Arbitrary sample size
- Target SE of overall accuracy
- Target SE of area of a class
Based on your selection your screen will update to look like one of the options below.
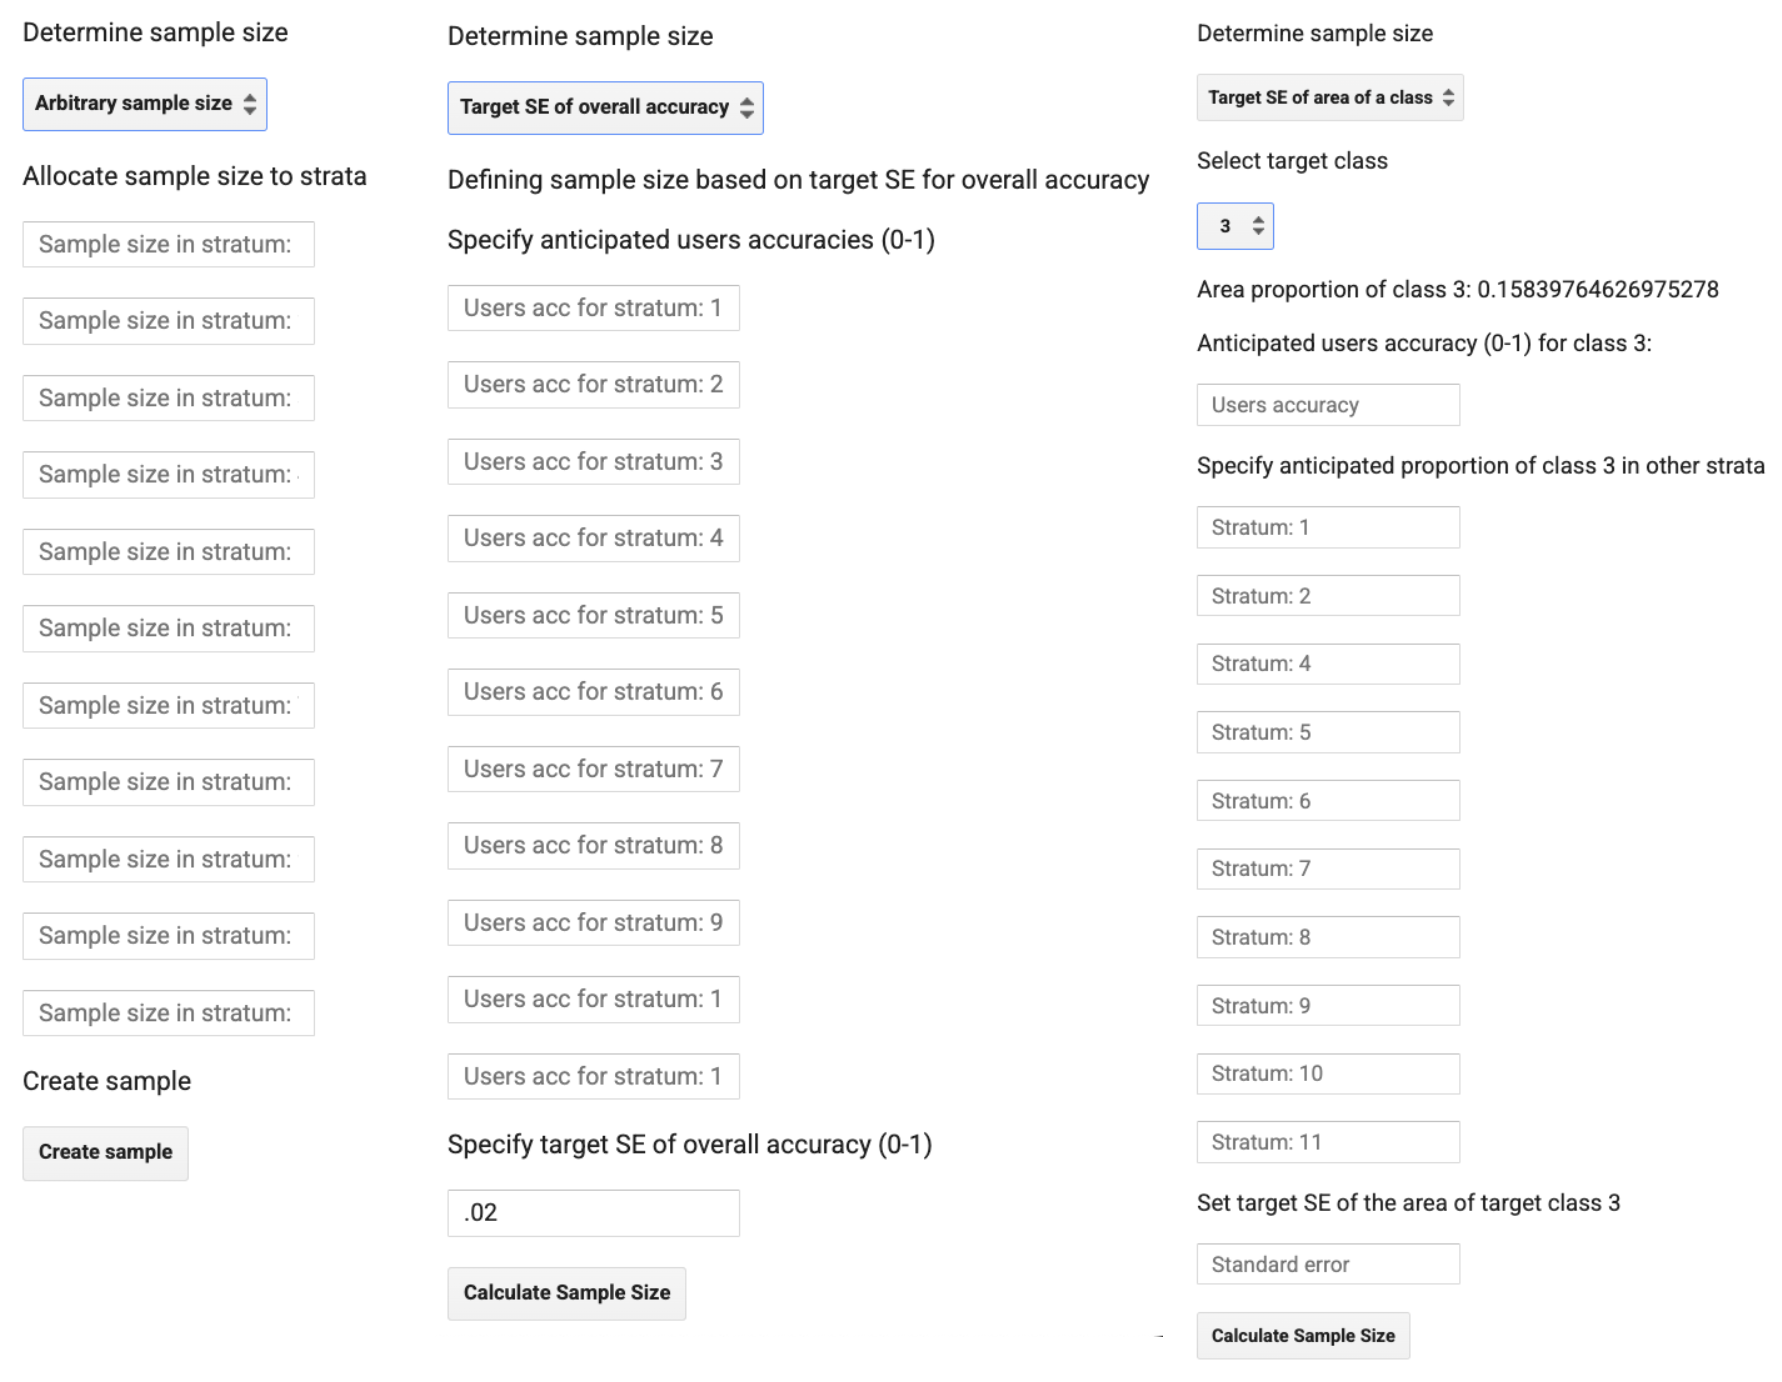
7. Since we are using these samples for training a random forest model, we can skip over the equations used for sample-based area estimation analyses to calculate the appropriate sample size. For Random Forest, generally, the more points the better. At a minimum you should aim to have 10 times as many points per strata as you do features (bands of imagery the model will observe). So if our composite image has 20 bands, we should at least have 200 points per strata if we were doing a full classification. If resources allow, more points per strata, especially for those with a lot of variation in their characteristics, will improve the results.
So we will use the Arbitrary sample size option with this in mind.
Note:
If you were performing a sample-based area estimation with these points, you would likely want to use one of the latter two options. You would use values for expected User’s Accuracies and target Standard Error in the same way you just did in SEPAL.
You would also be required to place samples in all areas of the map, even over cloudy strata. For sample-based estimates of the full population it is a rule that all areas must have a non-zero probability of being sampled.
8. Remember, these are the map values of the stratification map we are using.
| Numeric code | Class name |
|---|---|
| 0 | no data |
| 1 | forest_80 |
| 2 | forest_30_80 |
| 3 | forest_30 |
| 4 | mangroves |
| 5 | settlements |
| 7 | water |
| 8 | grassland |
| 9 | shrub |
| 10 | bare soil |
| 11 | sand |
| 25 | clouds |
Since we are using these points for training a machine learning model and not for statistical sample-based estimations, we do not need to include points in the non-relevant classes, such as clouds. Any class you sample now will be a class in your final model.
A large number of points will make the tool run more slowly. Choose a reasonable number of points per strata for this demo.
Do not put any points in the last class, which is clouds.
9. Click Create Sample and then add them to the map. You can zoom in on the map to see these samples once they load.
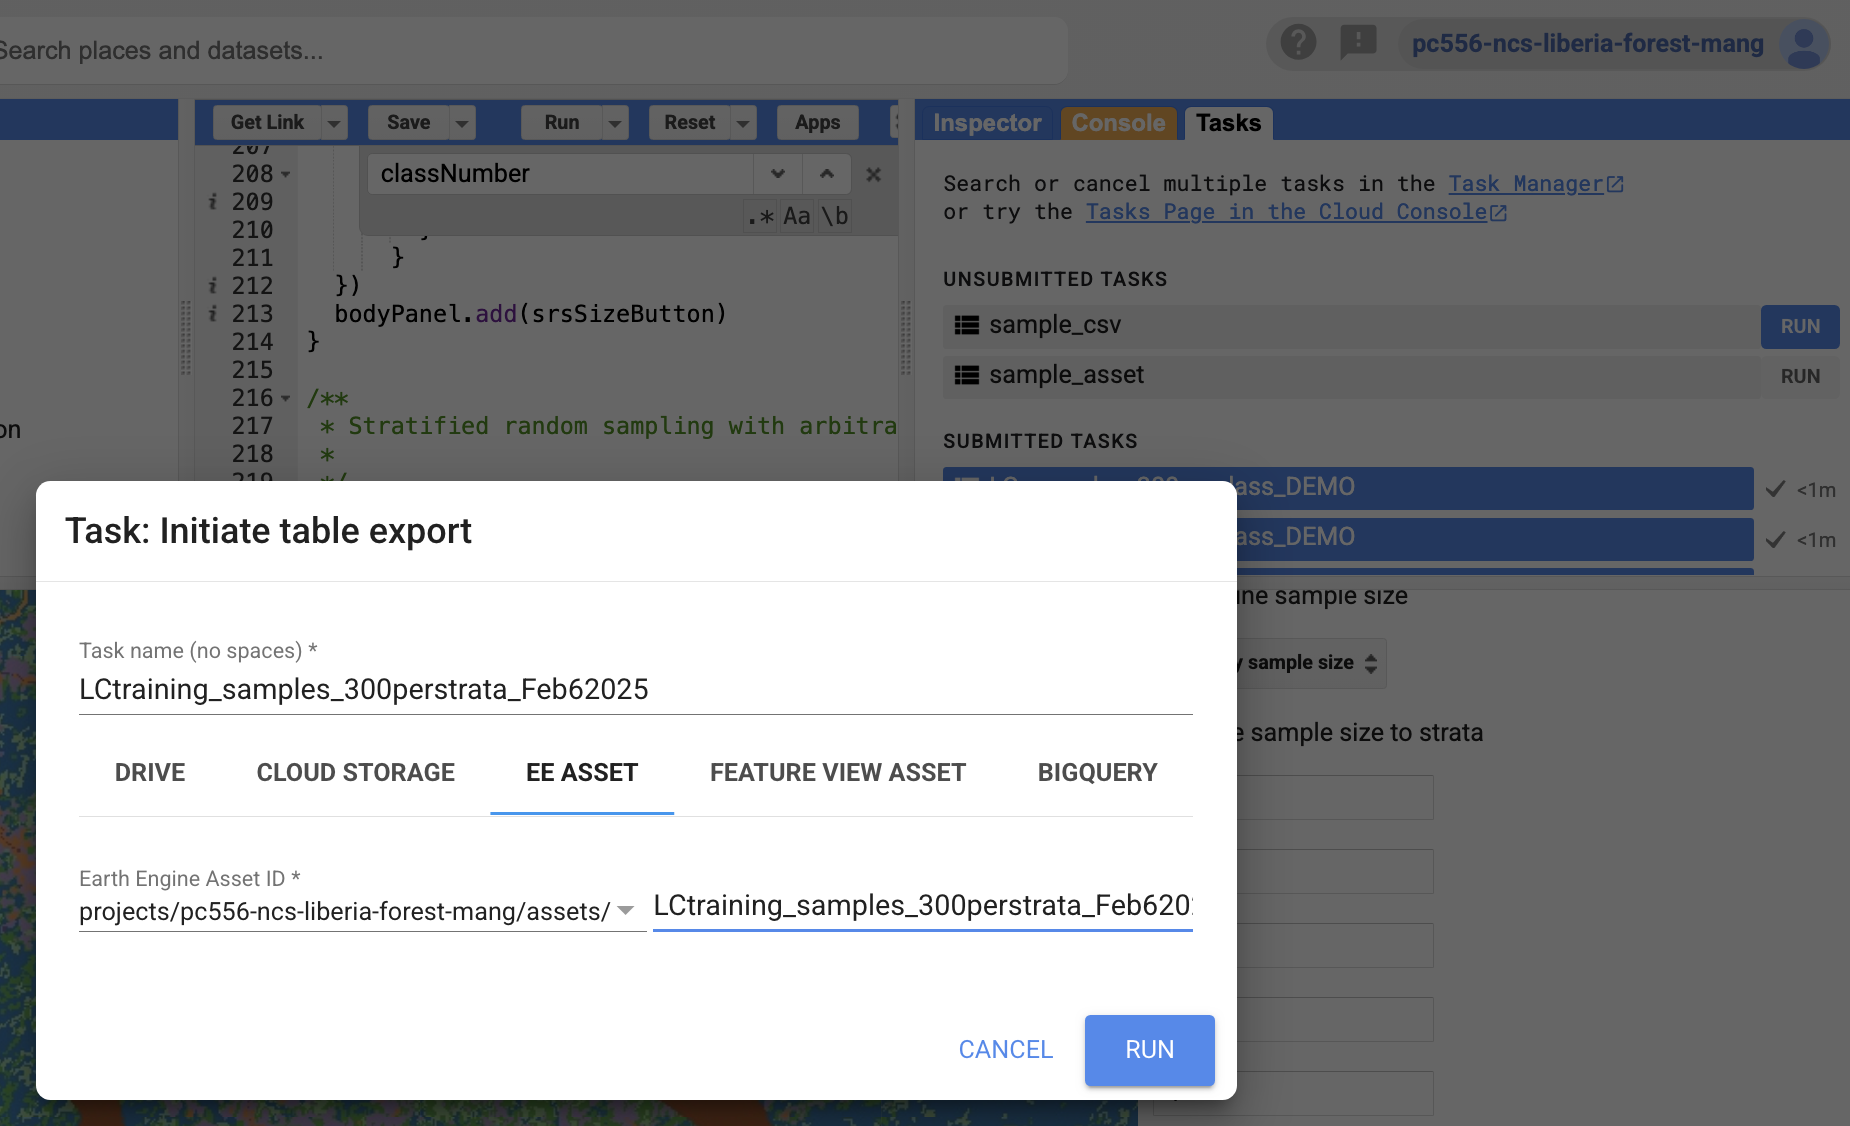
10. Click Export samples.
11. Go to the Tasks tab at the top right. From there you can download the samples as a CSV to your Google Drive and as a GEE asset to your cloud assets folder. Make sure you give the file/asset an informative name, including points per class and the creation date. You can also add metadata to a GEE asset once it is created.
The output will look something like this in Drive: 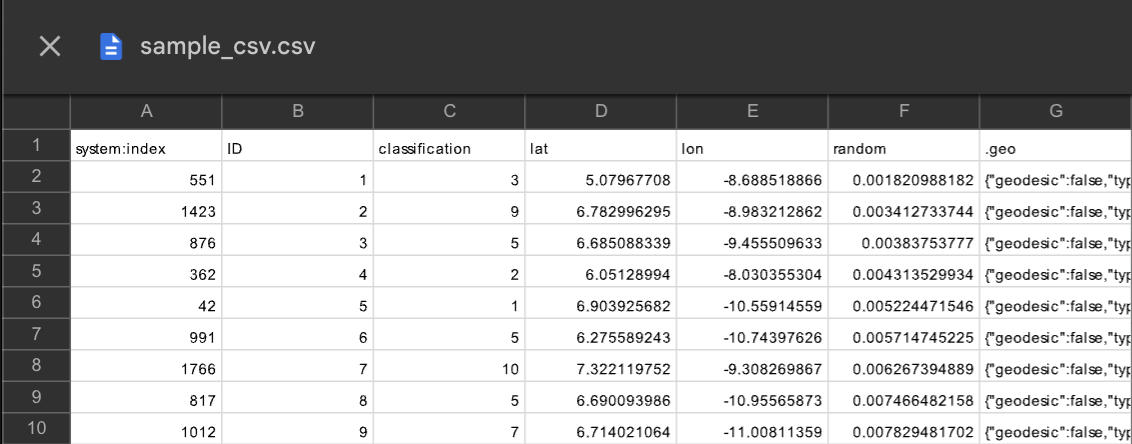
Challenge
- If you make your own copy of the scripts, you can go into the script itself and alter the default input parameters to your own so you do not have to keep retyping them in the GUI.
- You can also add a randomization seed as a parameter into the .stratifiedSample function. This would allow for repeatability of your sampling design if you set and record this parameter.
Further Resources
We reviewed how to use AREA2 in a follow-up workshop to this event. The recording of that walk-through is here. You can stop watching at 16:00, when the topic switches to uploading the samples to CEO. The Google Sheets template we used in the follow-up workshop to calculate the number of samples per strata (proportional with a minimum sample size) is here. You can make a copy of the template in order to make your own edits.