Preprocessing Imagery in SEPAL
Optical mosaics
A video-tutorial is available in this YouTube video.
A mosaic is a combination or fusion of two or more images. In SEPAL, you can create a single raster dataset from several raster datasets by mosaicking them together. This can be achieved on both contiguous rasters (first image below) and overlapping images (second image below).
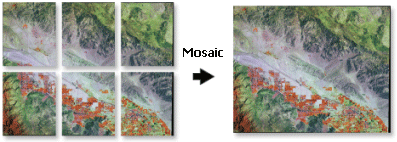
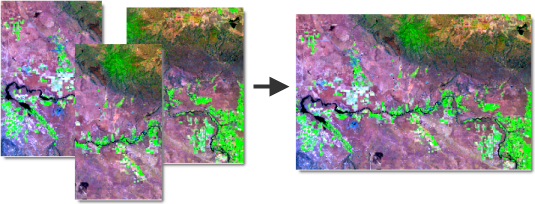
These overlay areas can be managed in various ways. For example, you can choose to:
- Keep only the raster data from the first or last dataset.
- Combine the values of the overlay cells using a weighting algorithm.
- Average the values of the overlay cells.
- Take the maximum or minimum value.
In addition, corrections can be made to the image to account for clouds, snow, and other factors, but these operations can be complex and repetitive.
SEPAL offers an interactive and intuitive way to create mosaics in any area of interest (AOI).
Note:
In order to be able to retrieve the images, be sure to connect your SEPAL and Google Earth Engine (GEE) accounts.
Start
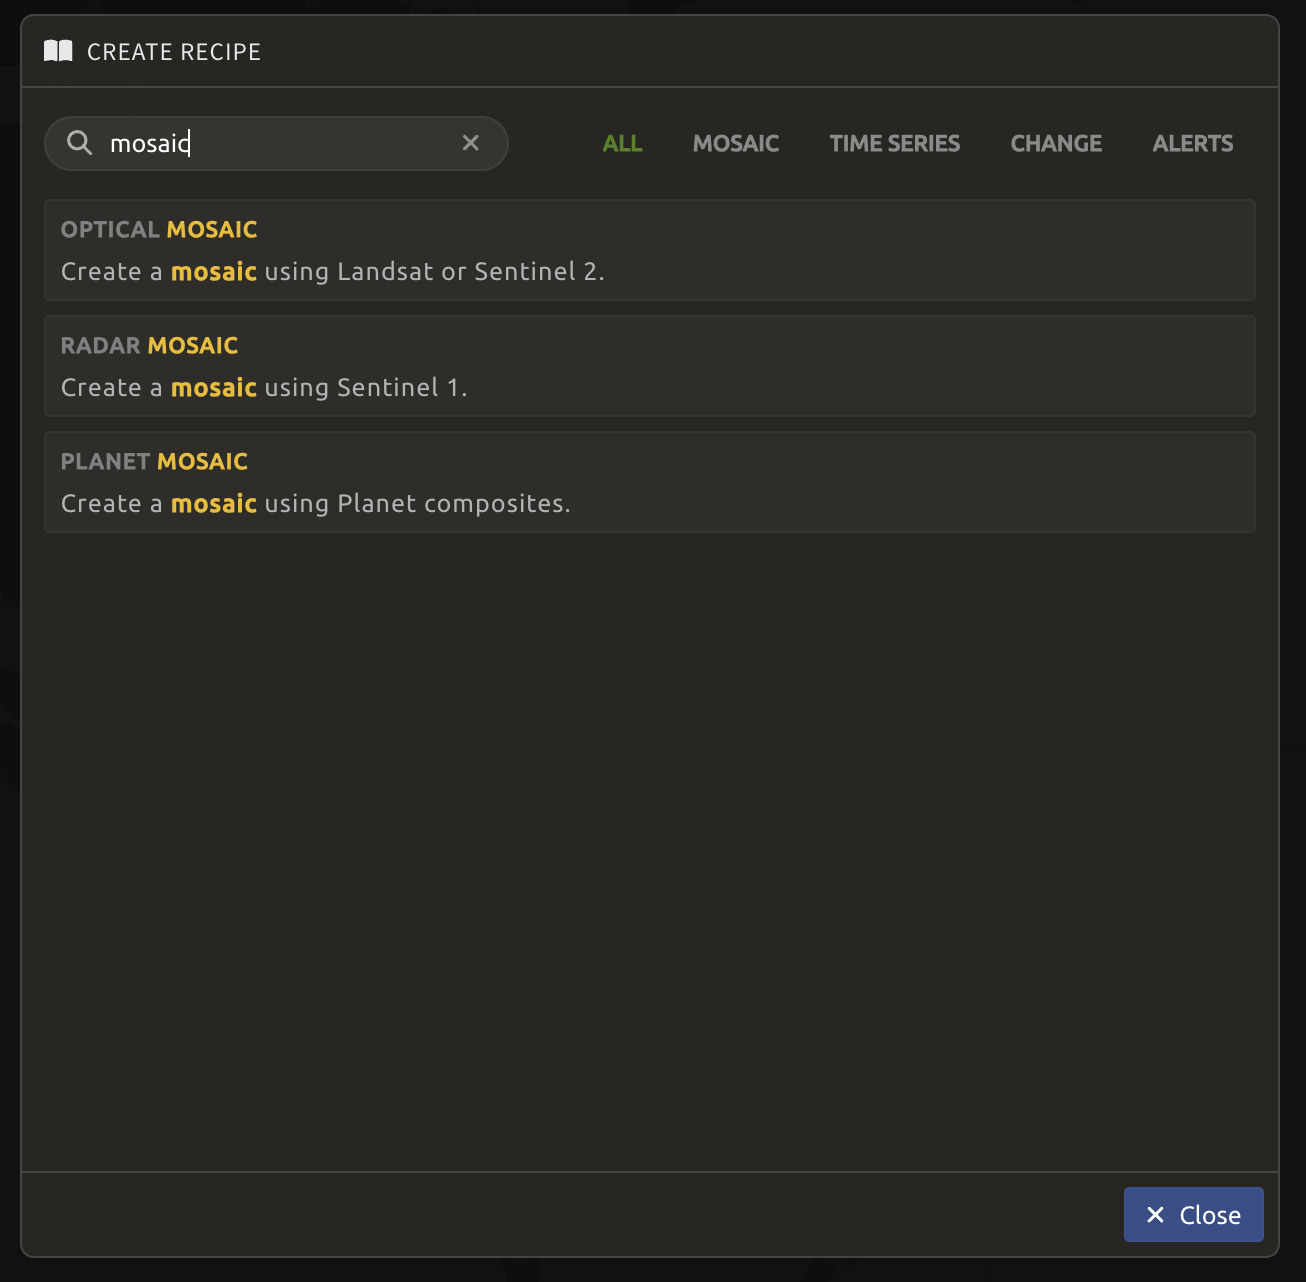
At the top-left of your screen, click the green Add recipe button and type mosaic to select the Optical mosaic recipe.

Once the mosaic recipe is selected, SEPAL will display the recipe process in a new tab (1) and the AOI selection window will appear in the lower right (2).
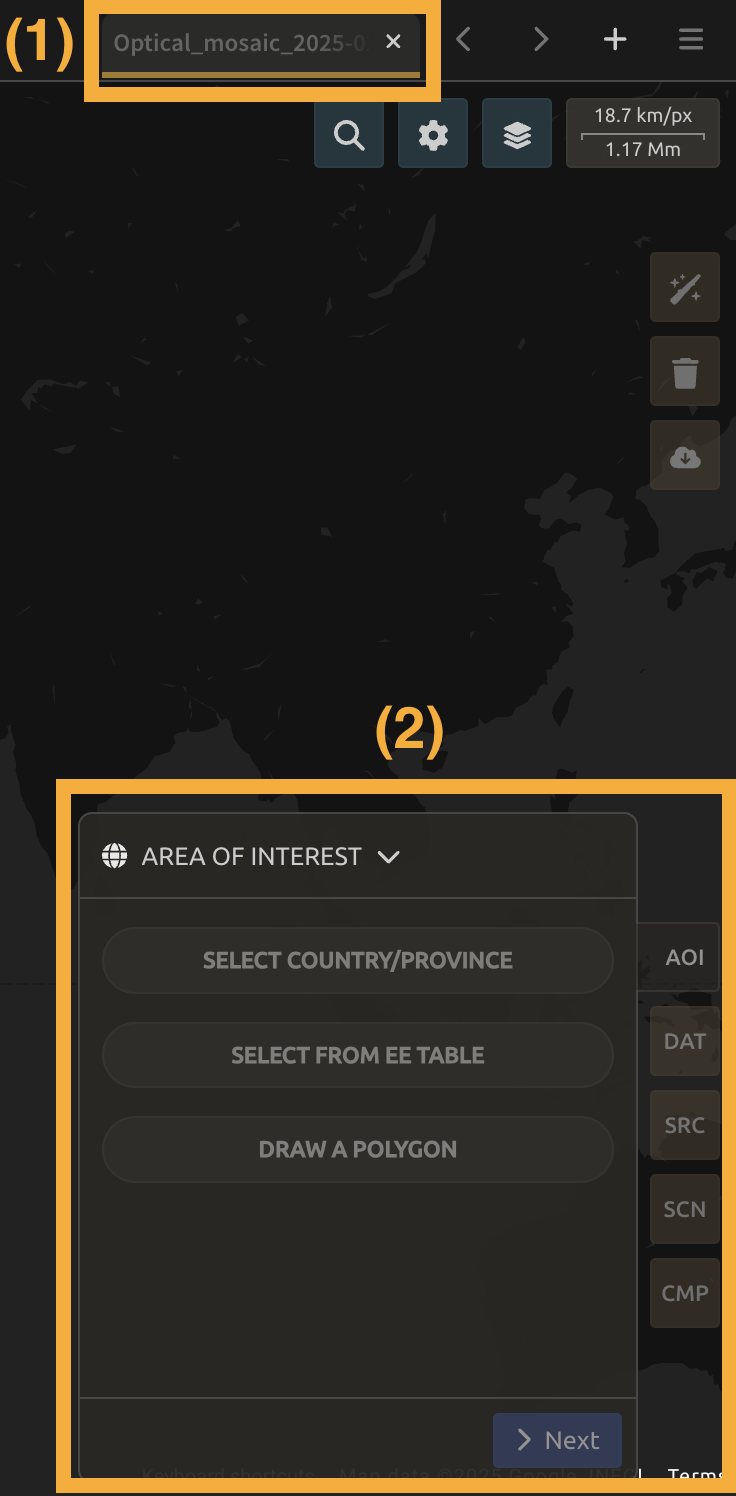
The first step is to change the name of the recipe - it will be used to identify your files and recipes in SEPAL folders. Double-click the tab and write a new name. It will default to:
Optical_mosaic_<start_date>_<end_date>_<band name>
But it is recommended to use the following naming convention:
<aoi name>_<dates>_<measure>


Parameters
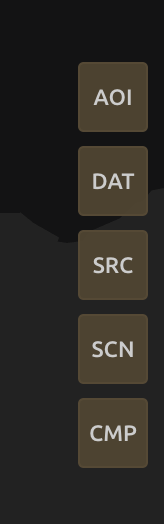
In the lower-right corner, five tabs allow you to customize the mosaic creation:
AOI: Area of interest.DAT: Target date of interest for the mosaic/composite.SRC: Source datasets of the mosaic/composite.SCN: Scene selection parameters.CMP: Composition parameters.
AOI selection
The data exported by the recipe will be generated from within the bounds of the AOI. There are multiple ways to select the AOI in SEPAL:
- Administrative boundaries
- EE Tables (from GEE assets)
- Drawn polygons
For more details, see AOI selection.
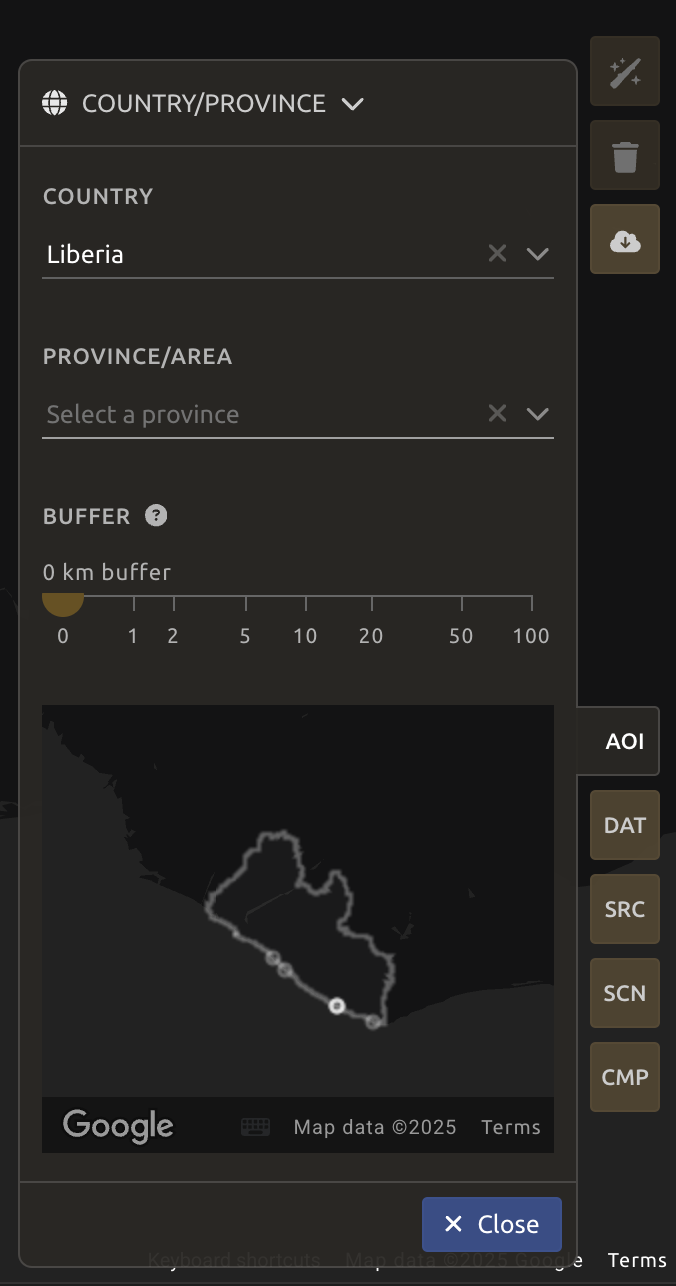
For this workshop, type Liberia in the country cell under the AOI tab and also select one of the provinces, since a smaller area will export faster for the purposes of this workshop. Click Next.
Date
Yearly mosaic
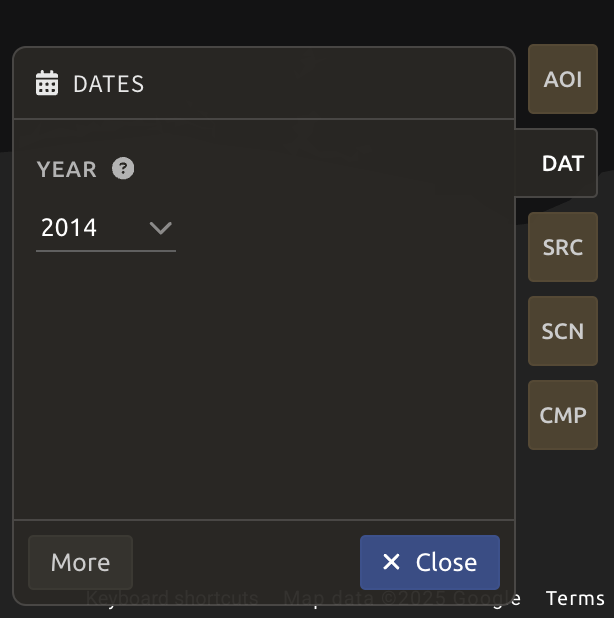
In the DAT tab, select a year of the data to be used in the mosaic. Let’s select 2014 here. Then click Next.
Seasonal mosaic
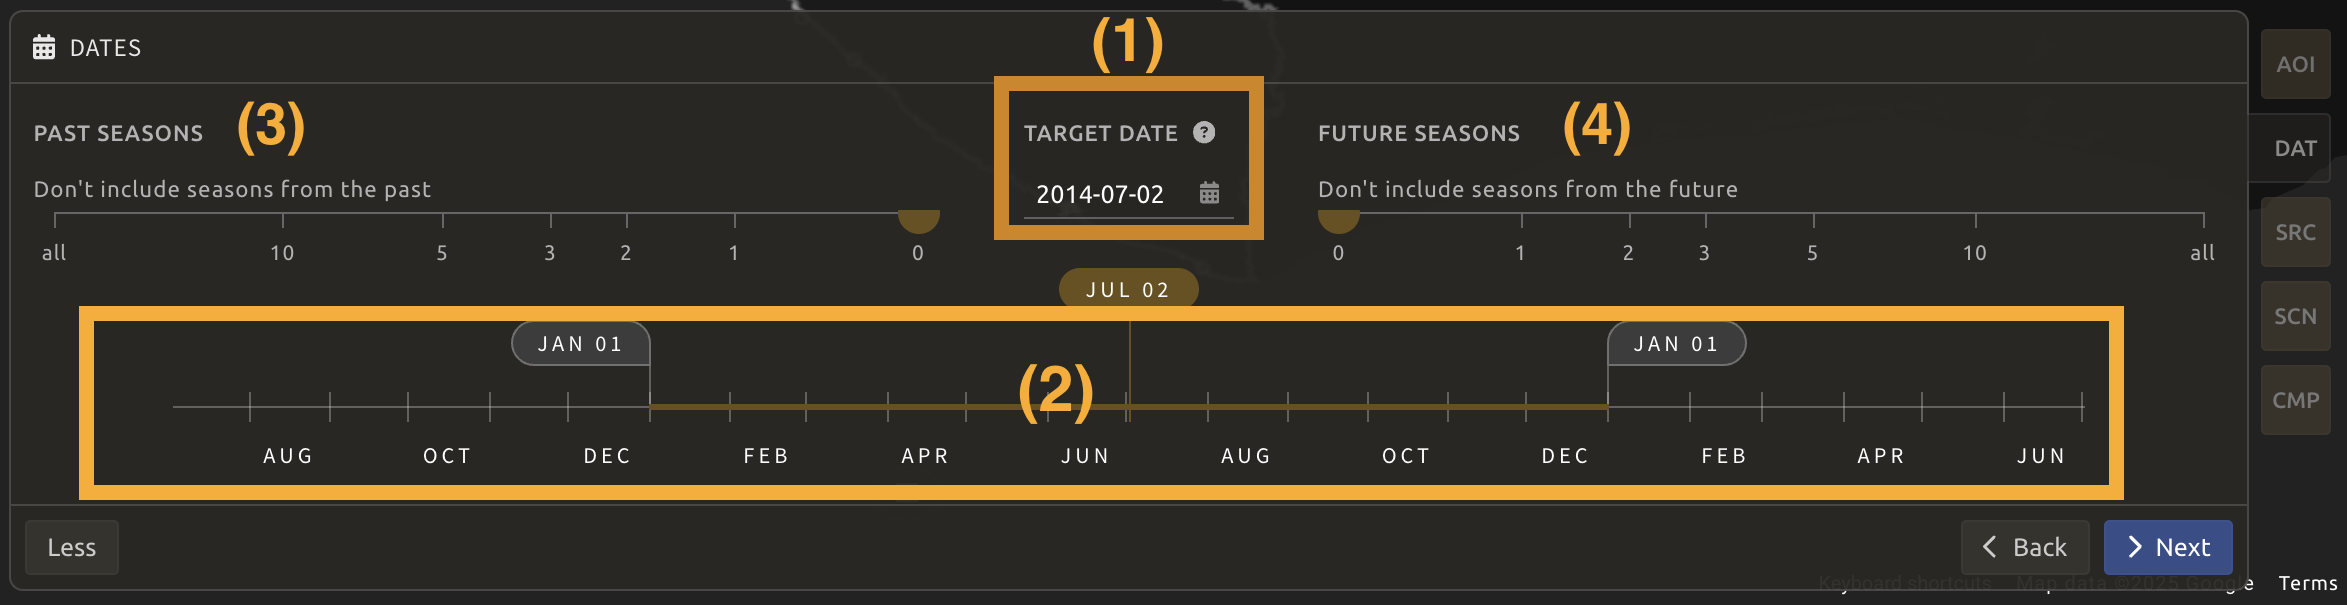
You can also expand the date selection tool in the DAT panel by clicking More to select a season of interest.
- Click the calendar icon (1) to open the Date selection pop-up. The selected data will be the one from which pixels in the mosaic should ideally come from.
- Use the slider (2) to define a season around the target date.
- Since the number of images in a single season of one year may not be enough to produce a mosaic, we can use two secondary (3 for
Past seasonand 4 forFuture season) sliders to increase the pool of images. - When the selection is done, click
Next.
Sources
A mosaic uses different raster datasets obtained from multiple sources. SEPAL allows you to select data from multiple entry points:
- L9: Landsat 9 Tier 1 and Tier 2
- L8: Landsat 8 Tier 1 and Tier 2
- L7: Landsat 7 Tier 1 and Tier 2
- L4-5: Landsat 4 Tier 1, Tier 2, and Landsat 5 Tier 1, Tier 2
- S2: Sentinel-2 Multispectral
Let’s select L8 Tier 1 and click Done. 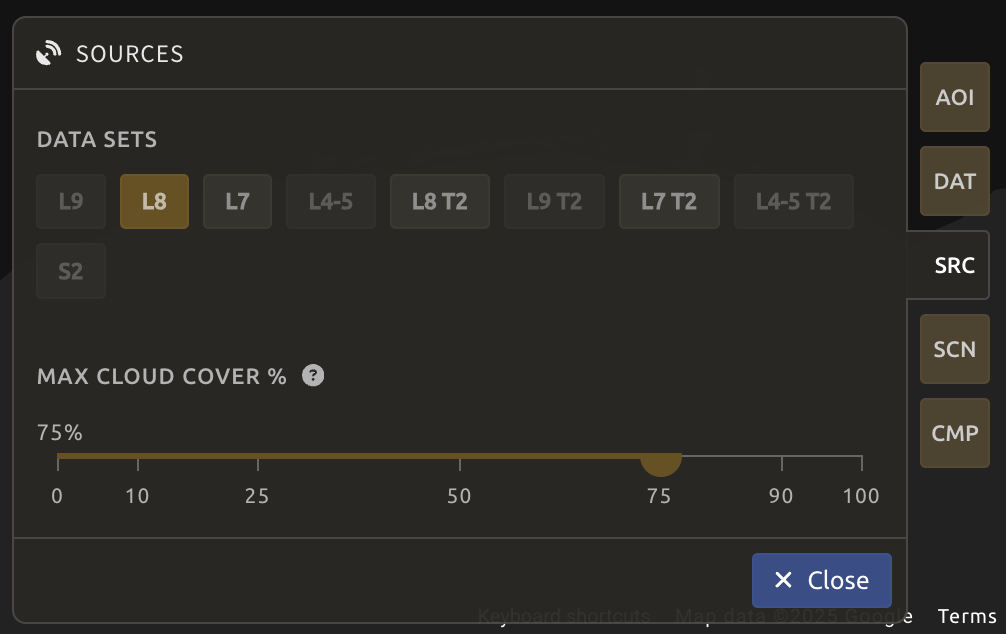
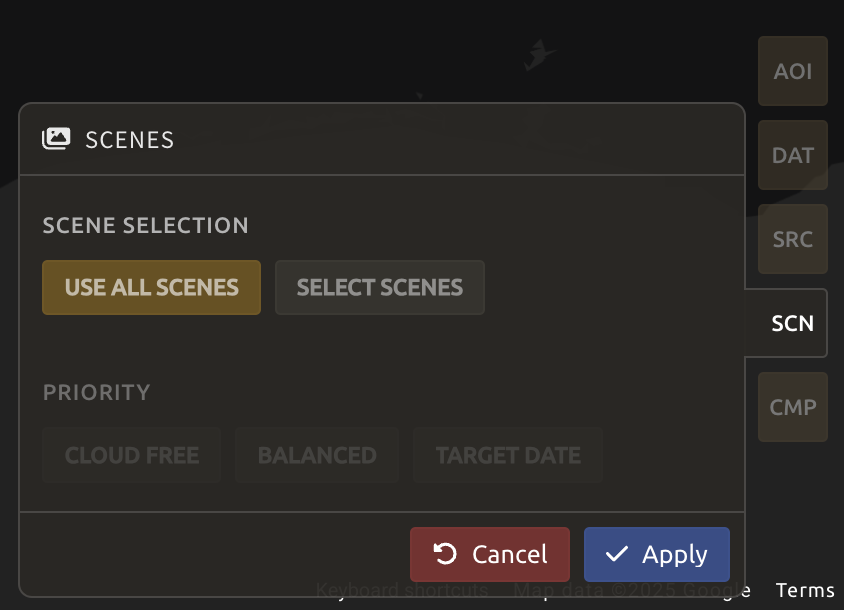
Scenes
Note: If Sentinel and Landsat data have been selected, you will need to use all scenes. As the tiling system from Sentinel and Landsat data are different, it’s impossible to select scenes using the tool presented in the following sections.
You can select scenes for mosaic manually or automatically:
- Use all scenes: Includes all available images based on date parameters.
- Select scenes: select one of the following Priority options:
- Cloud free: prioritizes images with zero or few clouds.
- Target date: prioritizes images that match the target date.
- Balanced: maximizes both cloud-free and target date criteria.
Let’s select Use all scenes and click Apply.
Composite
Note:
Default options:
- Correction:
SR,BRDF- Pixel filters: No filters
- Cloud detection:
QA bands,Cloud score- Cloud masking:
Moderate- Cloud buffering:
None- Snow masking:
On- Composing method:
Medoid
For our workshop, we will use the default settings, but we encourage you to explore different options and refer to SEPAL documentation under Composite for further details. Click Apply.

Analysis
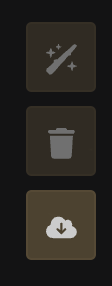
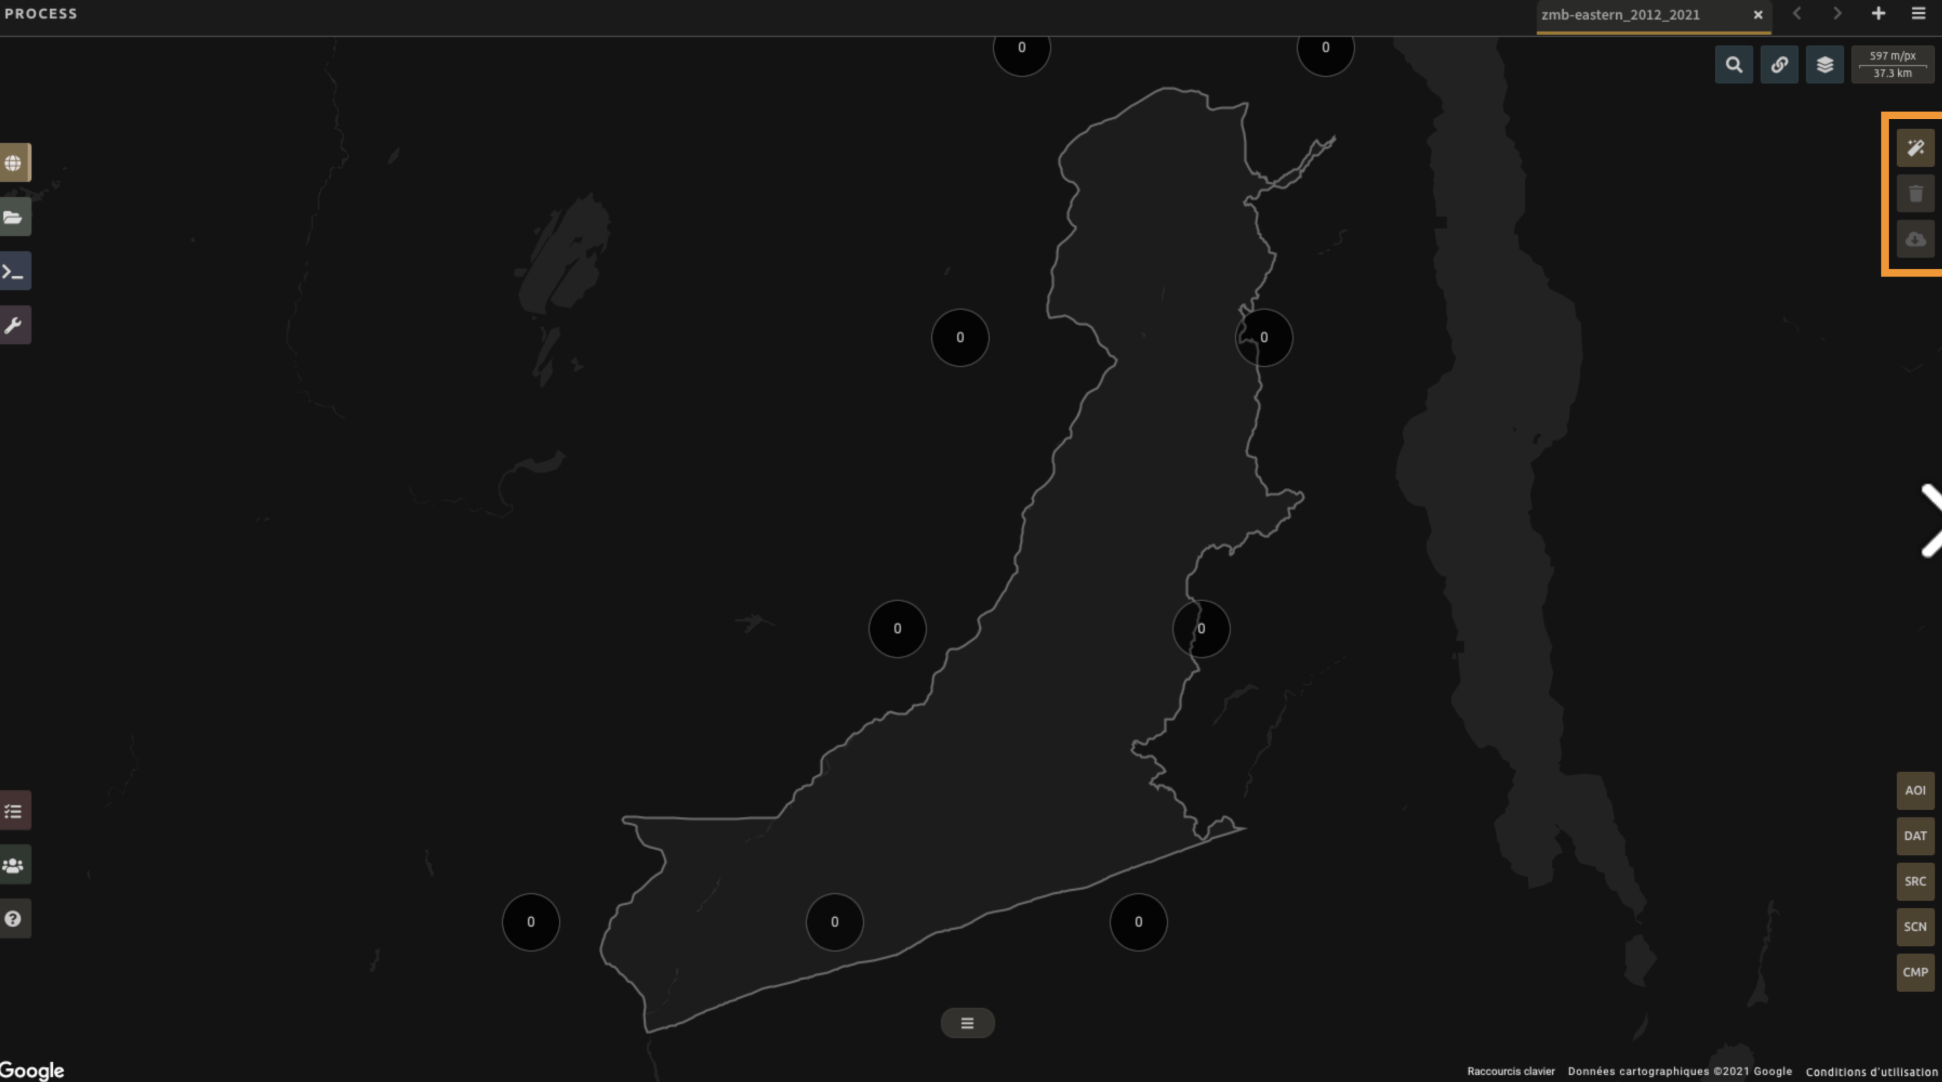
In the upper-right corner, three tabs are available, which allow you to customize the mosaic scene selection and export the final result:
Auto-select scenesmagic wand iconClear selected scenestrash bin iconRetrieve mosaiccloud download icon
Note:
Since we have not selected the option Select scenes in the
SCNtab,Auto-select scenesbutton will be disabled for us and the scene areas will be hidden as no scene selection needs to be performed.If you can’t see the image scene area (such as in the image below), you probably have selected a small AOI. Zoom out on the map and you will see the number of available images in the circles.
Retrieve
Important:
Exporting of a
.tifffile requires a small computation quota (see Resource setup).
Click the Retrieve mosaic button (cloud download icon) to open the Retrieve pane where you can select the parameters for exporting.
Bands
You need to select the band(s) to export with the mosaic. There is no maximum number of bands, but exporting useless bands will only increase the size and time of the output. To discover the full list of available bands with SEPAL, see Optical Satellite bands, transformations, and indices.
Tip:
There is no fixed rule to the band selection. Each index is more adapted to a set of analyses in a defined biome. The knowledge of the study area, the evolution expected and the careful selection of an adapted band combination will improve the quality of downstream analysis.
Dates
dayofyear: the Julian calendar date (day of the year)dayfromtarget: the distance to the target date within the season in days
Scale
You can set a custom scale for exportation by changing the value of the slider in metres (m) (note that requesting a smaller resolution than images’ native resolution will not improve the quality of the output – just its size – keep in mind that the native resolution of Sentinel data is 10 m, while Landsat is 30 m.)
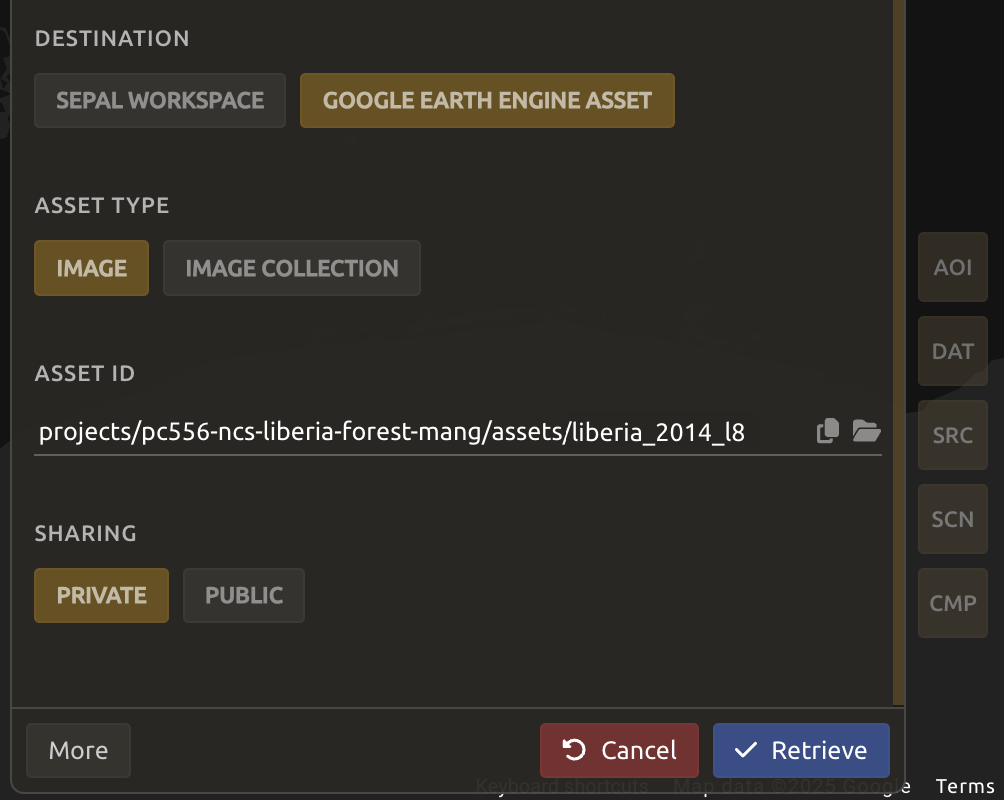
Destination
You can export the image to the SEPAL workspace or to the Google Earth Engine Asset folder. The same image will be exported to both; however, for the former, you will find it in .tif format in the Downloads folder; for the latter, the image will be exported to your GEE account asset list.
Note: If
Google Earth Engine Assetis not displayed, ensure your GEE account is connected to SEPAL.
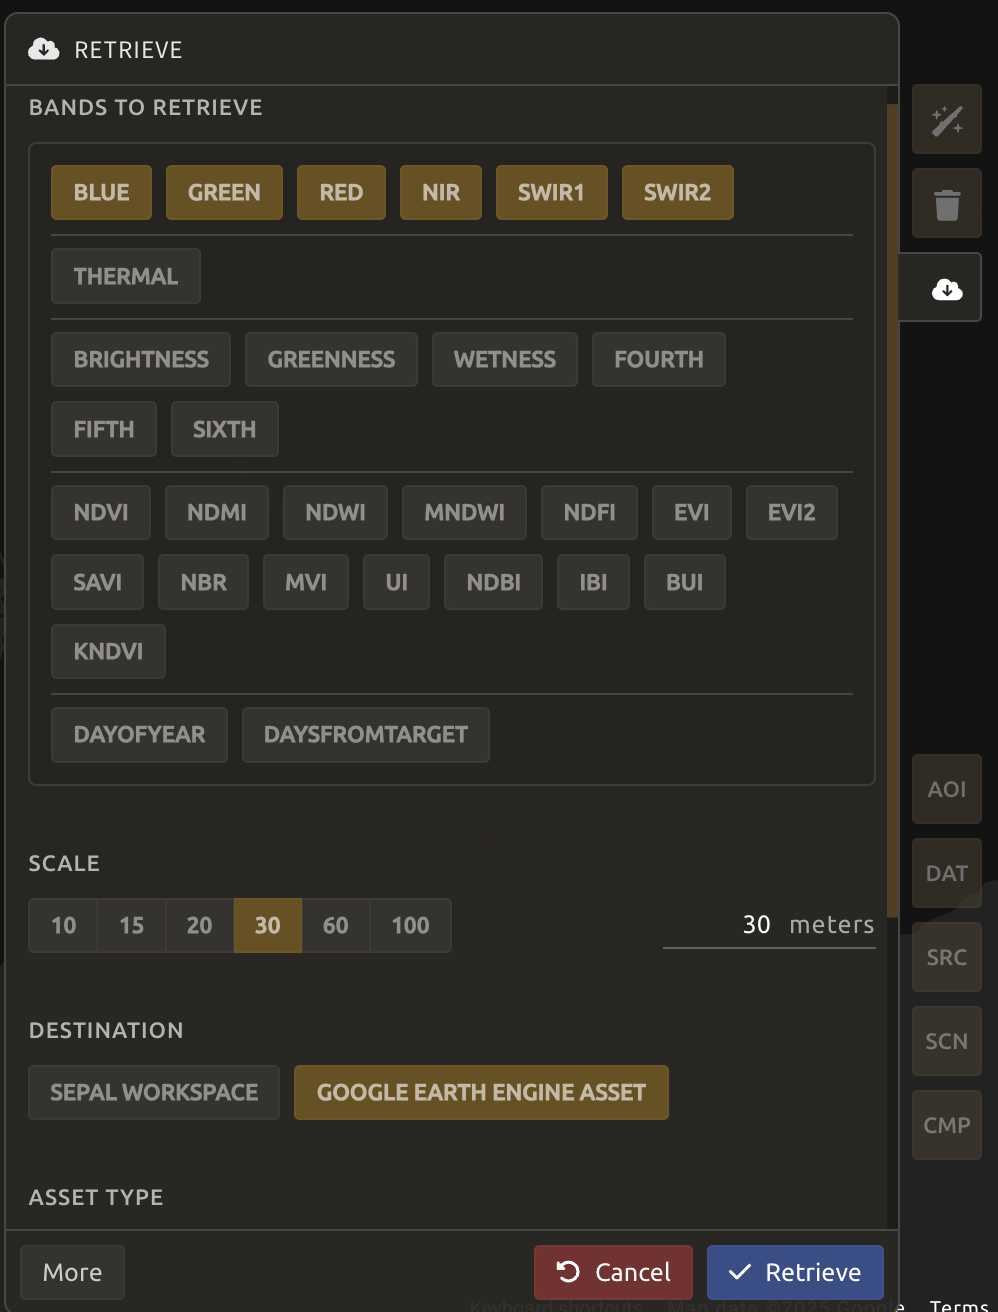
Select Google Earth Engine Asset and enter the directory where you want to export the assets. See the example below:
projects/pc556-ncs-liberia-forest-mang/assets/liberia_2014_l8
Select Retrieve to start the download process.
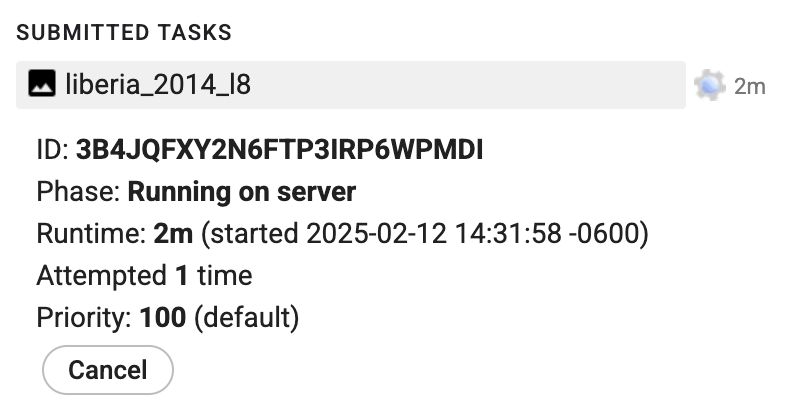
Exportation status
Monitor task progress in the Tasks tab (bottom-left corner of the screen). When the task is finished, the frame will be displayed in green.


Note on Exporting Data
Tests showed exporting 2014 L8 T1 took about 25 minutes, and exporting 2024 L8 T1, L9 T1, and S2 took about 4 hours.
Tip:
This operation is running between GEE and SEPAL servers in the background. You can close the SEPAL page without stopping the process.
If you have selected GEE Asset as a destination, then you can also monitor tasks using the GEE task manager.
Access
If exported to SEPAL workspace, the data is stored in the Downloads folder. You can access it using the following format:
.
└── downloads/
    └── <MO name>/
        ├── <MO name>_<gee tile id>.tif
        └── <MO name>_<gee tile id>.vrt
If exported as GEE asset, you can find it in your asset folder under the name of the optical mosaic as it was created in the first section of this article.
Now that you’ve downloaded the optical mosaic, you can use it in other SEPAL workflows.
Radar mosaics
A video-tutorial is available in this YouTube video.
In addition to Optical imagery, you can also access Radar imagery through SEPAL. The SEPAL recipe for radar mosaics allows users to generate analysis-ready data (ARD) from the Sentinel-1 C-Band synthetic aperture radar (SAR) mission, which can be used in subsequent analysis, such as land cover classification.
The following steps demonstrate the default procedure for creating a yearly timescan, useful for tasks such as land cover mapping.
- Select Radar mosaic within SEPAL Recipes.
- Select your area of interest (AOI) and the year.
-
Check for orbit coverage.
- Deselect all processing parameters.
- Select Ascending orbit and let the mosaic render.
- Deselect Ascending orbit and select Descending orbit. Let the mosaic render.
- See if both orbits cover the entire AOI.
- If they do not, select the orbit that covers the entire AOI.
- If they do, select both and let the mosaic render; then, check for artifacts that may originate from using both orbits.
- Select Terrain under Geometric operations.
- Select Moderate under Outlier removal.
- Export Median, Min, Max, and STD layers for both polarization bands VV and VH.
Follow the video tutorial linked above, which demonstrates these steps in a reproducible way.